Espresso Macarons With Chocolate Espresso Ganache

Espresso Macarons with Chocolate Espresso Ganache

French macarons have been on my ever growing to do list since 2014, when I had the blissful experience of tasting a Laduree Cafe macaron in the heart of Paris! At that time, I downloaded this great how to make macarons book on amazon and committed to get baking as soon as we landed in the states. A short 5 years later, I made my first macaron. This is pretty typical for my project lists. Is it just me?

how to make french macarons

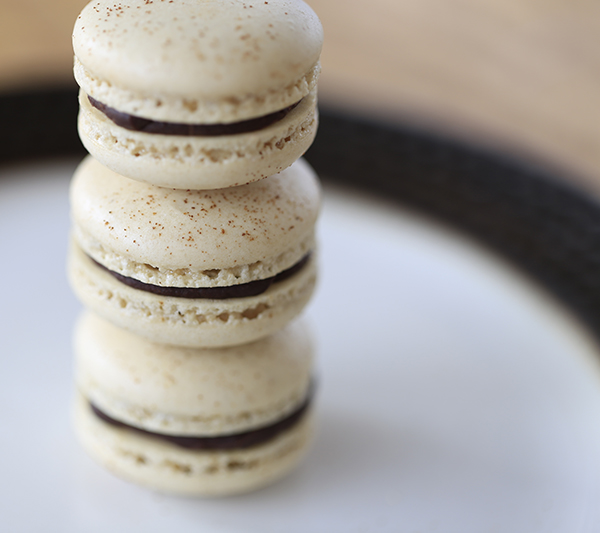
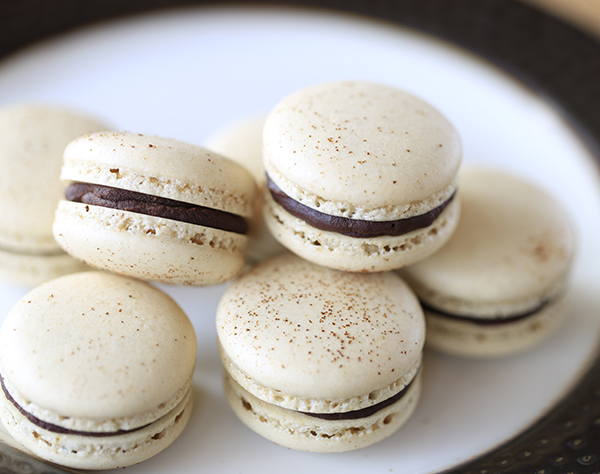
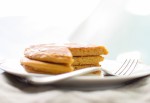
Did you know there are actually three methods for making the cookie part of the macaron, which is a meringue mixed with almond flour, powerdered sugar and maybe a flavoring (in this case espresso poweder)? It’s true. I call these french macarons, but technically I guess I should call them swiss macarons. That’s just not as search friendly on google! I say this because I use the swiss meringue method now, after many, many batches using the french method, and a couple of swings at the italian meringue method, I have found the swiss method to be the most consistent and reliable. The very first batch I made using this method came out beautifully. Wanna see?

Lemon Buttercream Macarons

Trust me, no hear me, when I say that there were many imperfect batches that preceded what you are seeing here. As I agonized over failed, lumpy, cracked, hollow, nipply shells, wanting to launch the tray out the back door like a frisbee, my husband would remind me of a quote…

“I have not failed. I’ve just found 10,000 ways that won’t work.”
― Thomas A. Edison

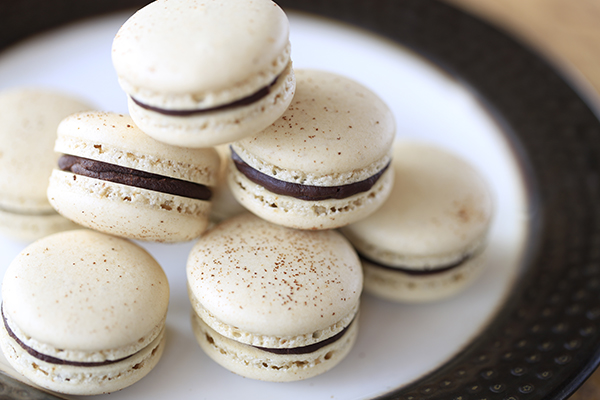
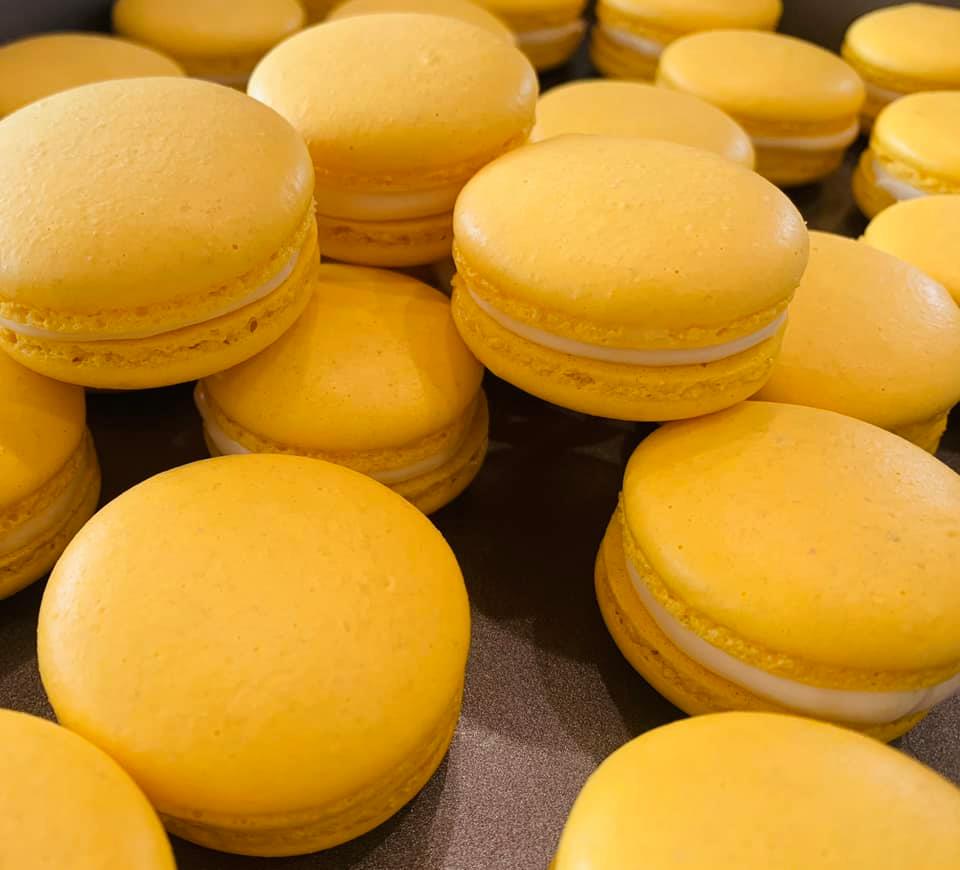
This would annoy me further, but then sanity would return and I would be back at it. I am so happy I stuck with it, and you will be too. It is super gratifying to create a beautiful batch of these delicious treats. I find myself waking up in the middle of the night excited about a new flavor combo! Today I am doing mango shells with white chocolate lime ganache. I can’t wait!

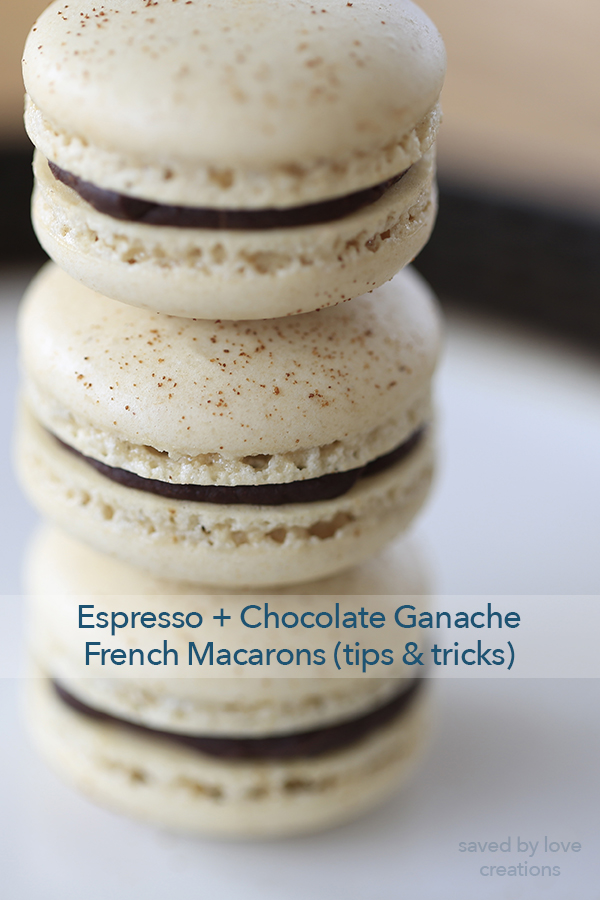
Espresso Macaron Recipe

TIP: So the basic recipe for the shell is the same, and quite simple. Then to flavor it, you can add extracts, freeze dried fruits, baking emulsions. This can be trial and error, as some oils will anger the shells and you will end up trashing them. I bought a bunch of flavored oils from a local candy shop and they are a no go! Extracts are ok. I prefer grinding up freeze dried fruit and really adding the most flavor in the center ingredient of the sandwhich. Ganache is far easier to flavor.

Ingredients

Espresso Shells

*This recipe yields between 24-30 complete sandwhiched macarons, depending on how your piping size (this will make sense later).

  • 3 egg whites 100 grams, 3.5 oz
  • 1/2 cup white granulated sugar 100 grams, 3.5 oz
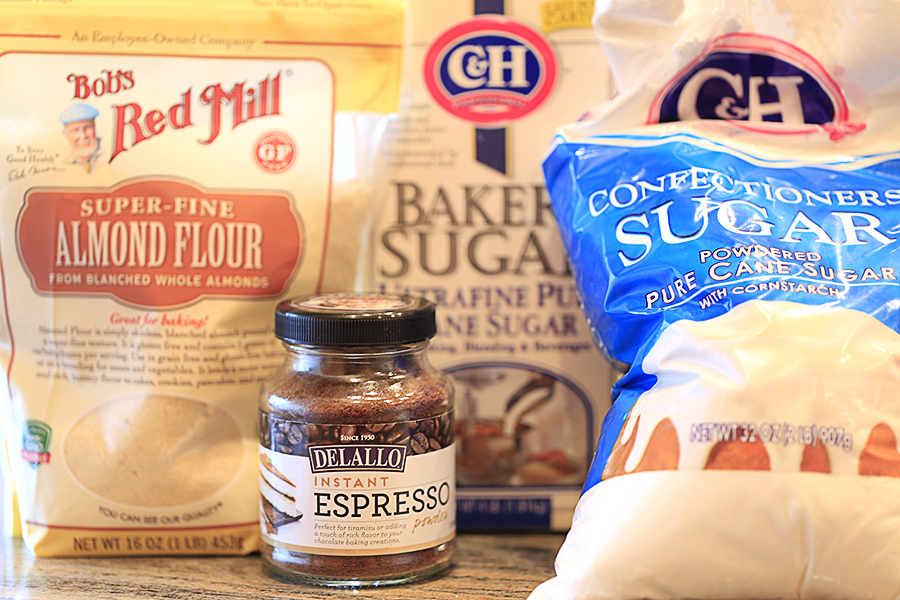
  • 1 cup almond flour 96 grams, 3.4 oz
  • 3/4 cup powdered sugar 90 grams, 3.17 oz
  • 1 1/2 tsp espresso powder

Espresso Chocolate Ganache Filling

  • 8 oz bittersweet chocolate, chopped up into <1 inch sized pieces
  • 8 oz heavy whipping cream
  • 3/4 teaspoon instant espresso powder

***Make the ganache ahead of time as it needs to sit in the refrigerator for a couple of hours, then at room temp for 30 minutes before piping between the macaron top and bottom

Instructions

Shells

  1. To start, measure out all of the ingredients. I highly recommend investing in a kitchen scale for accuracy as these cookies are so very fickle. I measure my ingredients in grams, even though I have listed cup and teaspoon measurements as well. I got this digital kitchen scale from amazon. Have 2 baking sheets ready. You can line them with parchment paper, which is how I started, but I found no matter how many tips and tricks I used to flatten the parchment paper, it bubbled and led to warped cookies. This is why I LOVE the mats I ordered on amazon here: silicone baking mats for macarons . They are super cheap and awesome. If you go the parchment paper route, you can print off templates to help you pipe out the optimal size macaron and stay consistent so that your sandwich cookie tops and bottoms match. Here is the free macaron template printable I made, which you can download, print, place under your parchment paper and carefully pull out immediately after piping your macarons in a later step.
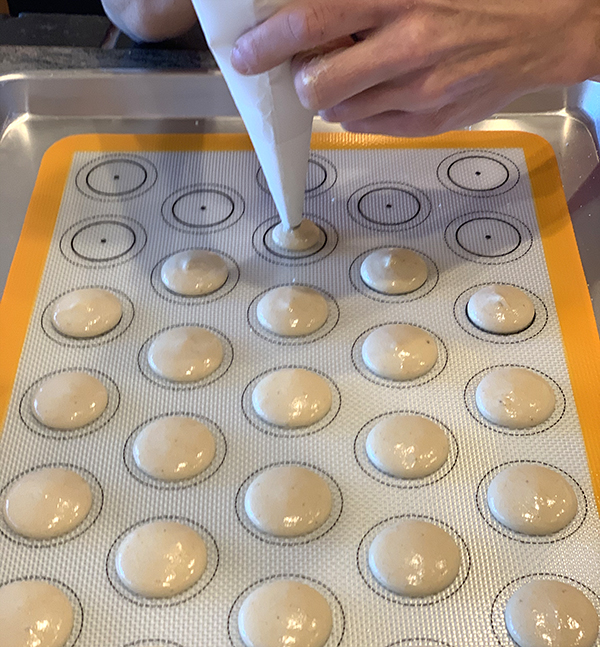
  2. Leave a 16 in disposable piping bag fitted with a large round tip (size 10 or 12), all ready to fill with your batter.
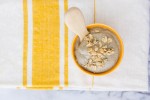
  3. Sift powdered sugar and almond flour together in a bowl and set aside. Some people swear you need to grind the flour and powdered sugar in a food processor. I have done both ways and I see no difference, so I don’t waste the time. It is supposed to get rid of “bumps and lumps” in the shell of the macaron. I find mine come out smooth if I sift the ingredients together into a bowl, and then sift them into the meringue when that step comes.
  4. Mix egg whites and sugar together in a metal bowl or in a double boiler pan, over a small saucepan of simmering water, making sure the bottom of the bowl isn’t touching the water. I actually use my KitchenAid mixer bowl for this, since the egg/sugar syrup will go into it anyway. You do not want to cook the egg whites! No thermometer needed. This is what I love about the swiss meringue method vs. the italian method. The latter requires a candy thermometer. It’s a hassle.
  5. Whisk whites and sugar over simmering water for about 90 seconds. Remember, this water shouldn’t be boiling, it should be at a very low simmer.
  6. Once sugar is dissolved, pour the syrup to the electric mixer bowl if it’s not already in there. With the whisk attachment, whisk mixture on low speed for 1 minute, raising speed to medium. Whisk on medium for 1-2 minutes, until the whisk starts to leave streaks in the meringue. Raise speed to high, and whip for a couple of minutes until stiff peaks are formed. Here is a great video from my macaron hero at Pies and Tacos . It shows what the meringue should look like. Make sure you look at her other amazing macaron recipes, tips and tricks!
  7. As soon as the meringue reaches stiff peaks, stop beating. Sift (for the second time) the almond flour and powdered sugar mixture into the meringue. You will see many recipes having you add 1/3 of the mixture, folding it in, then incorporating the remaining dry ingredients. I find no difference when i sieve it all into the meringue at once. Try and see what works for you!
  8. Now it is time to fold the dry ingredients into the meringue. Here is a great video from Indulge With Mimi, another wealth of information on macaron trouble shooting and some fantastic recipes. This folding of the dry ingredients into the meringue is called macaronage, and is in my opinion the step that makes or breaks your final product. If you don’t mix enough, you get cracks and all sorts of ugliness. If you over fold, you get wet blobs that never bake into solid, round cookies. It’s tragic, but don’t give up! You will get this with experience. This video will help.
  9. The batter should be falling off of your spatula like a ribbon, not in chunks. I like to scoop a spoonful out onto a plate and wait 20 seconds or so. If the “nipple” on top dissolves into the cookie and disappears, you are ready to pipe your macarons. If not, stir 5-10 more times and test again. Keep doing this until you get the correct result.
  10. Pipe as many circles as your batter allows. I usually fill two of my silicone mats, sometimes a few less on the second mat. Immediately after piping, pick up the baking tray about 6 inches above the counter and drop it. Do this a couple of times. The purpose is to release any air bubbles in your piped macarons. How to Pipe Macarons
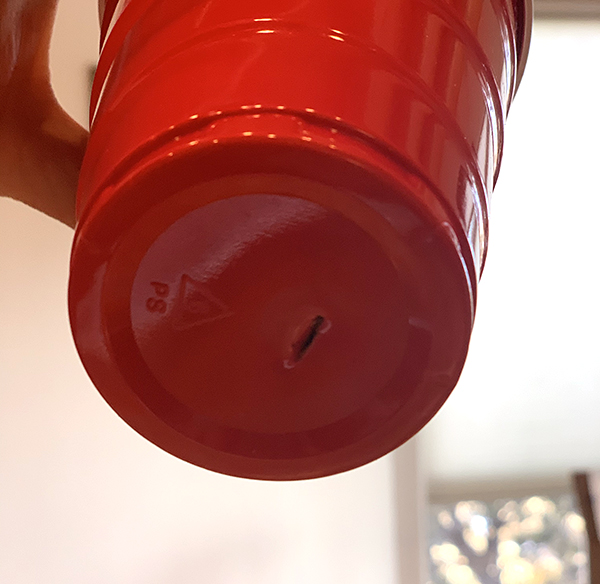
  11. For aesthetics and for more espresso flavor (cause I’m a full blown addict, we cut a slit in the bottom of a red plastic solo cup and put a small amount of espresso powder in the cup. Then lightly tapped the side of the cup over the tray of piped cookies for some espresso powder sprinkles. I tried using a salt shaker, but way to much powder came out, so my engineer husband McGyvered a way to get the effect I was after.
  12. Pre-heat the oven to 310F. This is what works in my oven. Yours may vary. You will have to start somewhere around there, take meticulous notes and make adjustments as needed! Remember the Thomas Edison quote earlier in the post!
  13. Many recipes tell you to leave your piped batter sit out before for 30-60 minutes to form a skin before placing in oven. I happen to live in the high desert and my macarons form a skin within 5 minutes. The way to test for yours is to touch one lightly. No batter should come off on your finger. There should be a dull sheen to them as well. The skin is important, otherwise the heat will escape to quickly and the macarons won’t rise correctly, or they will have blown out feet (the bubbly area of the cookie that directly contacts the filling of sandwich). If it is a humid day, it may take well over an hour, so go by feeling the actual batter, not by time.
  14. Bake one tray at a time. Bake the first tray for, rotating after 4 minutes. Bake 4 more minutes and rotate again. I continue to bake until 18 minutes, rotating one more time at 13 minutes.
  15. Let the cookies cool for 20 minutes or more before trying to remove them from the parchment paper or silicone mat. They should pop right off unless they are under cooked. In which case, back in the oven they go. I would do 2 minutes at a time. You don’t want to overcook and get hollow macarons. Once they are cool, it is time to fill…

Chocholate Espresso Ganache

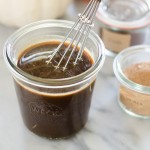
To make the espresso ganache, place the chopped up chocolate into a metal or other heatproof bowl. In a small saucepan, heat the cream until bubbles appear. Stir in the espresso powder until dissolved.

Immediately pour the hot cream mixture over the chocolate chunks and let stand for 1 minute. Stir the chocolate until smooth and melted. Pour the ganache into a disposable 12 or 16 inch piping bag clip or rubber-band off the open end and place in refrigerator for 2 hours. When you are ready to use the ganache, let it sit at room temperature for 30 min so that it is soft enough to squeeze out of the bag.

Simply cut the tip off the disposable piping bag containing your ganache and fill one cookie, coiling from the outside into the center, then place the top cookie on to complete the sandwich. It helps to match up similar size macarons before adding the filling so your tops and bottoms are together and ready to go.

Place in an airtight container in the refrigerator. I find macarons are the very best after maturing in the fridge for 1-2 days. This allows the center to mesh with the shell, the flavors to meld and the texture to perfect. Take out of the fridge for about 20 minutes before enjoying. They are best eaten within a week. Another option is to freeze after the 1-2 day maturation. I have frozen them for 6 weeks, pulled them out to room temp for 1 hour and served them up at a party to watch them be devoured. They were a hit.

coffee french macarons

Give macarons a try! Don’t give up. Be patient and learn your climate, oven, astral alignment. Pray to the macaron gods. Whatever works for you. Just find it. It is so worth the “failed” attempts! Let me know how it goes.

Stay tuned for macaron videos and more recipes!
Tips and tricks for making perfect french macarons

Go prAna or Go Home

I was e-l-a-t-e-d when I was asked to try out some PrAna gear and share with you, my lovely readers, an exclusive discount code!

Let’s start with the good stuff, your 15% off discount code! WPJCF18

Now, about me and my relationship with PrAna! I moved to Colorado 3 years ago and became an avid rock climber. Obsessed. What that has to do with prAna is that it quickly became the most prominent brand in my closet, not only because of it’s aesthetics, but because it is the best brand I have found to stand up to the demands of body vs. rock!

PrAna is not just for women, either. John loves his Woodman Flannel, and I can’t take off my Diva Long Jacket. It is extremely warm and the perfect length! It is lined by clouds, I am pretty sure.

The hood is perfect at keeping my ears from freezing off too.

Also, you get to look good while preparing to pelt your photographer with a snow ball. I mean, come on, priorities people!

The pants are prAna as well, my favorite for rock climbing. Unfortunately I don’t do a ton of that outside when it’s cold since feeling one’s fingers is important in that particular sport, but they are great for hiking and being active in general. I love them for rock because they don’t get picked and have snags in them after climbing sharp granite or limestone walls.

The are also fantastic for tree napping.

The stitching is solid and I’m digging the sweater ribbing on the sides of the Diva Jacket…

Their logo is subtle and well placed, and the stitching, again, solid on the Woodman’s Flannel.

John is also sporting one of his favorite pair of prAna pants in addition to the flannel.

Since we couldn’t show you outdoor climbing, we took our prAna to the indoor gym! These pants are the best! I wear them almost every time I climb

And John in his favorite climbing pants, which just happen to be… you guessed it, prAna!

The are so flexible yet strong.

If you ever see me climbing and I am not in prAna gear, I may need a neurologic exam. Just saying. 

The quality is outstanding, but more importantly, prAna is a sustainable brand and uses organic cotton and recycled fabrics as they aim to help the planet. Read all about that here!

Full Disclosure: I did receive the Diva Jacket and Woodman’s Flannel to add to my already huge, self purchased prAna collection in exchange for sharing this information with you. All opinions are 100% honest and mine! This also has been the perfect segue into migrating a little away from DIY to more outdoor adventures and rock climbing. So HUGE thanks to prAna for what you do to help our planet and for being my go to outdoor gear! I love you!!

Another DIY Adirondack Set on the Cheap

DIY Adirondack Chairs and Table Pin

We are so excited building things for our new abode! Directly across the street is a lovely, wildflower, rabbit, squirrel and bird abundant park. We’ve decided to rid our lives of cable t.v., which affords us way more extra time than I realized, or care to admit. Instead of vegging out to the news upon awakening, we enjoy our morning coffee on the front porch in our super comfy adirondack set that we built with our own hands! We are forced to be more present and enjoy one another and nature more than ever, but the benefits of minimizing screen time are out of the scope of this article. I just want to talk about awesome adirondack-ness!DIY Adirondack Chairs Stools and Table

DIY Outdoor Furniture

This whole set took us a week, a few hours a day or so. We built the exact same set we shared in this DIY Adirondack Set post, so you can find the plan there.

DIY Adirondack Table

We changed the color scheme. I used Rustoleum Vintage Teal for the table. I found outdoor pillows at Walmart for $5 each that tied everything together!

DIY Adirondack Chair Woodworking Plan

Here is the first chair finished. Notice all the screw holes we had to fill before painting! I prefer Fast’N Final by DAP.

Chalk Painted DIY Adirondack Chair Set

For the chairs and stools, I used Rustoleum Chalked in Linen White. It took 3 coats, which in my experiences is a lot for chalk paint. All in all, I am happy with the product and will use it again.

All five pieces were sealed with Minwax Polycrylic Water Based Protective Finish. It is my go to!

Facebook Adirondack DIY

How to build Adirondack Chairs

We love our new set, and our mornings spent together, present and peaceful!

DIY Wood Shim Bookcase


Image 1


Whether it’s shiplap or pallet wood, rustic farmhouse-inspired accents and furnishings are on trend. But before you head out to find expensive aged wood, try this wood shim tutorial instead. You’ll find out how to incorporate that farmhouse signature look without breaking the bank with this simple, inexpensive and removable DIY for any bookcase.


You’ll only need one tool, a handful of materials and a couple of hours to elevate a plain bookcase into something so much more. Stacked alternating wood shims provide the texture, and a plywood base gives you the option to attach the panels using tape, making this DIY removable and commitment-free.


Supplies

For this project, you’ll need:


  • A bookcase (We choose one in a modern style, but you can use one that matches your home’s decor)
  • (1) 1/4”x 2 x 4 sanded plywood sheet
  • 2-4 packages of 15” cedar shims
  • Wood glue
  • Grey tone wood stain
  • Paintbrush
  • Mounting tape
  • Jigsaw
  • C-clamps
  • Tape measure
  • Pencil


Step One: Pick Up a Modern Bookcase

 
Image 2


Finding the right bookcase for this project is all about maintaining visual balance. The clean, modern shape of this bookcase is the perfect backdrop to showcase the natural, rustic quality of the cedar shims.


Since this project involves attaching wood panels to your bookcase, you’ll want to make sure that the bookcase you buy can support the amount of wood you want to add without becoming too heavy. It helps to start out with a lightweight bookcase and limit the wood shims to just the back panels of the bookshelf. Assemble your bookcase and measure the size of the space you want to cover using your tape measure.


Step Two: Cut the Wood to Size

 
Image 3


Take that measurement and trace it onto the plywood sheet twice. Cut out both rectangles using the jigsaw and set aside.


Next, you’ll need to determine the pattern you want for the wood shim accent panels. You can choose a classic brick pattern, basket weaving pattern or a simple alternating stacked pattern. I chose the latter because it followed the lines of the bookcase and provided a higher-quality finish. Mark and cut each cedar shim to match the width of the cut plywood rectangles. You’ll want to alternate thick and thin sides when stacking to maximize the play on texture and the farmhouse feel. You may need to cut the last wood shim lengthways to finish out the space. Go slow when cutting with the jigsaw to reduce any wood splitting or chipping.


Step Three: Glue and Stain

 
Image 4


Once you cut all of your wood shims, you can begin adhering them to the cut plywood pieces. Brush a light coating of wood glue onto the back of the shims and press them down onto the wood backing. Be sure to immediately clean up any excess glue that leaks out, as it can affect how the wood stain reacts with the wood. Clamp another piece of wood to the top of the wood panel to provide consistent, even pressure while the glue dries overnight. An optional improvement is to use small finishing nails to secure the wood shims to the plywood base.

 
Image 5


The next day, you can start applying the wood stain to the wood panels in light, even coats. Let the stain sit and penetrate the wood for a few minutes before wiping up the excess stain. I used about two coats to achieve my look. Allowing some of the natural cedar tones to show underneath will give the wood that authentic farmhouse quality. The stain will need to dry for a few hours before you can resume handling.


Step Four: Attach the Accent Panels

 
Image 6

 
Image 7
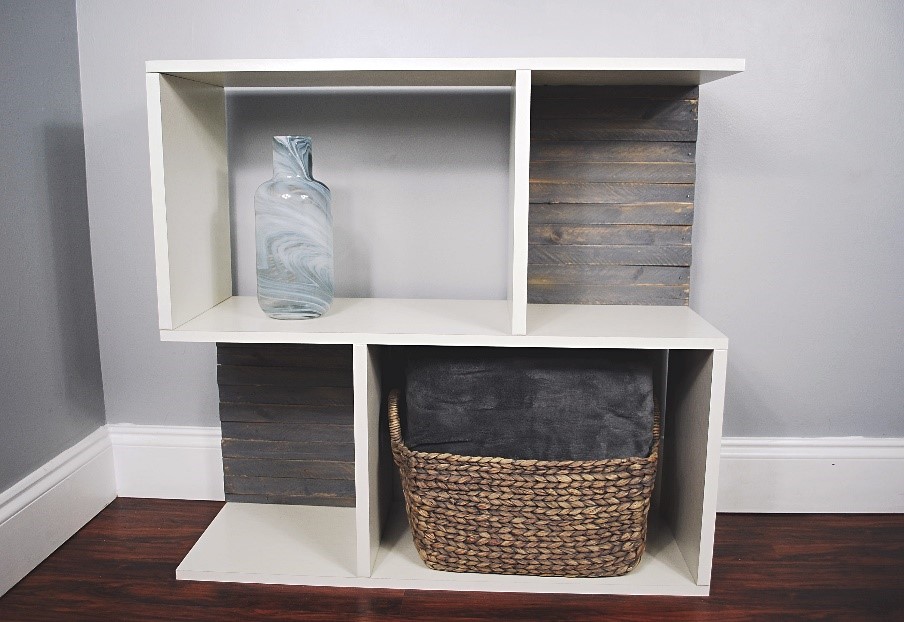
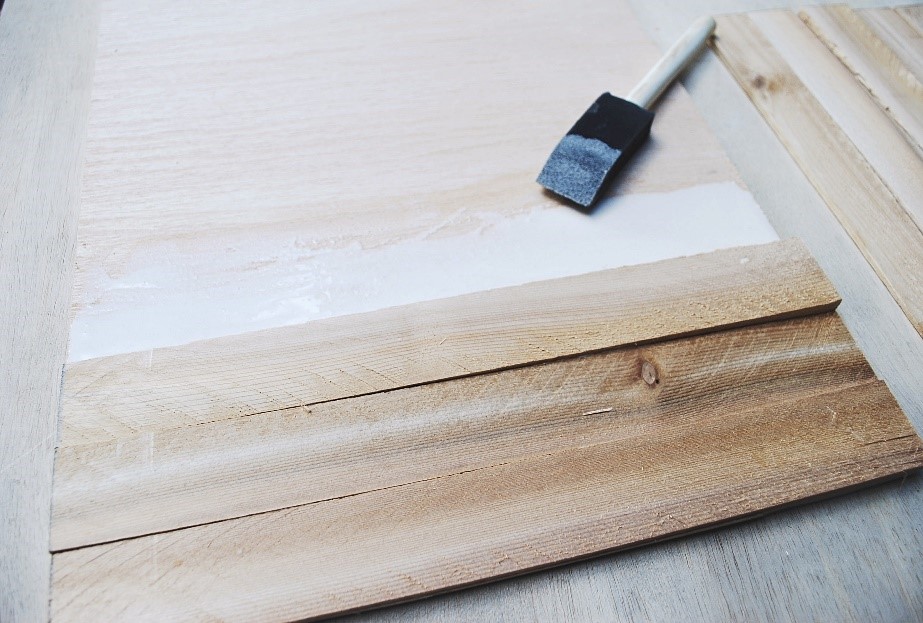
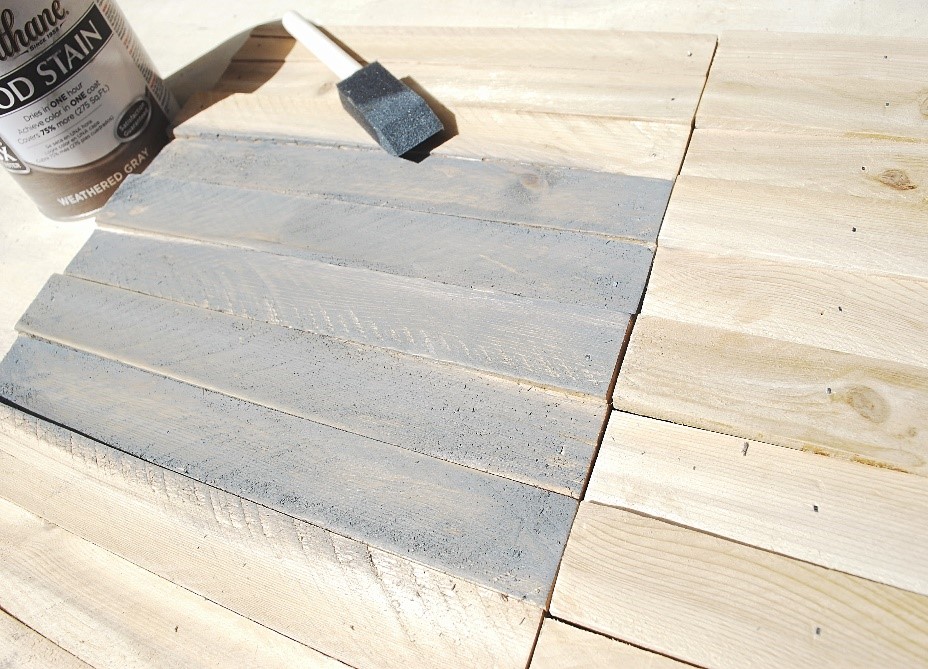
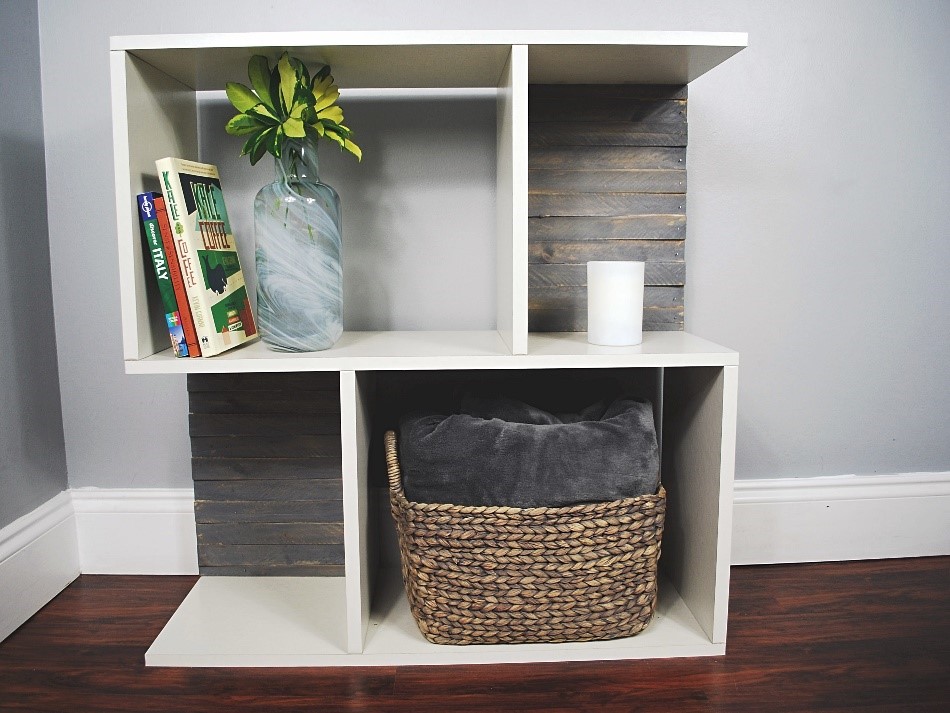
Cut several strips of mounting tape and apply them directly to the bookcase section where the wood panels will sit. Pop in your wood panels and press firmly for a few minutes to ensure a tight bond. Add a few books or decor items, and your farmhouse-inspired bookcase is done!


Mateo Londono is a longtime contributor to the Krrb blog who also writes for The Home Depot. He likes to create DIY projects and provide step-by-step instructions like he did in this article. To find a bookcase that you can add your own personal touch to, visit The Home Depot to see their selection of bookcases.


DIY WOOD SHIM BOOKCASE


DIY Birthday Decor Balloon Photo Display

Birthday Party Decor PIN

Add a personal touch to your birthday party decor, with this simple, quick and inexpensive DIY balloon photo display! This project can be translated to fit any celebration or holiday. Use photos of the happy couple for a golden anniversary celebration, or for wedding reception decor. Here you will see adult female birthday party decor, but use your imagination. The possibilities are endless, especially if you have a Balloon Time Helium Tank, allowing you to bring whimsy anytime, anywhere! Let’s get this party started…

For this project, you will need the following supplies:

Balloon Time Helium Tank

Balloon Time Helium Tank

Balloons in your color choice

Ribbon to tie off balloons

Photos to display

Glue dots or adhesive of your choice

DIY Photo Display Using Balloons FB

To create your own balloon photo display, follow these instructions:

Begin by printing off your favorite photos to go with the occasion. I edited photos in Photoshop to give them a black and white, framed Instagram type feel. I created a file sized to 8.5 x 11 inches and pulled each edited photo to the new file. Then I took them to my local big box office supply store and had them print 2 copies of the file on white card stock. It was $1.40 total! Cut them out and set them aside. You have 2 prints of each photo.

Inflating Balloon

Next, turn the green valve four times, counter clockwise. Slide the balloon neck over the black nozzle.

Balloon Inflating

Simply push down on the nozzle to inflate the balloon! So simple to use and convenient to have on hand for whimsical decor, any time.

Photo Display Ideas

Tie a knot in the balloon and attach ribbon to each balloon. Now you can use glue dots to adhere photos to the ribbon. Sandwich the ribbon between the 2 copies of each photo so that when the ribbon twirls with balloon movement, there won’t be a blank side.

That is it! Go grab a Balloon Time Helium Tank and show us what unique balloon displays you can create!

This is a sponsored conversation written by me on behalf of Balloon Time. The opinions and text are all mine.

DIY Slim Color Block Blanket Stand


How to make a blanket stand

As functional as it is chic, this blanket stand can hold several blankets while only taking up minimal floor space. The fun color block pattern adds some visual interest to your walls, and depending on the blankets, you can create a variety of interchangeable styles for your living room. Lean it against the wall by your couch for easy access to blankets on movie night and when the weather is warm, the blanket stand’s slim design stays out of the way.

Supplies:

  • Two 1 ½“ x 5’ pine handrails
  • Four ¾” x 14” wood dowels
  • Miter saw
  • Electric drill
  • ¾” Forstner drill bit
  • Orbital sander
  • Sanding sheets (220 grit)
  • Wood glue
  • Four strap (or trigger) clamps
  • Rubber mallet
  • Paint and/or wood stain
  • Painter’s tape
  • Blankets!

Easy beginner woodworking projects

Step 1: Gather Your Materials

This project calls for a slim ladder profile with a modern, clean look. Because of this, I went with round wood stock and dowels, as they are lightweight but still sturdy enough to support the weight of a few blankets. Handrails work perfectly for the sides of the ladder because they have a flat side that can butt up against the wall without rolling.


Cut Dowels and Handrails with Mitre Saw

Step 2: Cut the Handrails to Size

Using a miter saw, cut the two pieces of handrail material down to five feet in length, and the dowels, which will serve as the ladder rungs, into 14 inch pieces. To help keep the blanket stand propped up against the wall at the right angle, miter the bottom end of both handrails.


Prep wood for stain or paint

Step 3: Sand and Prep

A quick sanding with an orbital sander will clean up any splintering on the ends and prepare the wood for paint and stain.


Drill holes for dowel rods


Step 4: Drill the Holes for the Rungs

To make sure the holes are even, clamp the handrails together and mark out the placement for the ladder rungs. Leave enough space between the ladder rungs so that the blankets can fit. Once you have the placement marked, use a ¾-inch forstner bit to drill one inch into the handrails on both pieces. A forstner bit drills neat-flat bottom holes that are more precise than what you can usually accomplish with your standard drill bits or spade bits. The flat bottom holes will allow the dowels to fit securely and ensure the ladder rungs maintain equal length. Use some scrap sandpaper to clean out the holes and remove any stray wood curls.


Assemble dowel rods using glue

Step 5: Assemble the dowels
Squeeze some wood glue into the drilled holes and use a rubber mallet to gently tap the dowels into place. Repeat the process for the other handrail to bring both sides of the ladder together.


Clamp overnight

Step 6: Let the Rungs Set
To ensure a strong glue bond, use 4 flexible strap clamps (or adjustable trigger clamps) to place pressure on the joints. Clean up any excess glue and leave the clamps on until the glue dries, usually eight to 24 hours.


Apply chosen paint

Step 7: Apply the Color Block
Now that your ladder is constructed, you can begin adding a fun color block pattern. I went with a combination of finishes that draws your eye up, going from a dark matte grey, into a glossy green, into a light white stain that shows off the wood grain. Use paint-block painter’s tape to keep your paint and stain edges clean and straight.


Final Option 3

Step 8: Find the Perfect Spot, and Enjoy!
Lean the blanket stand up against the wall and place your blankets on the ladder rungs. Have fun experimenting with different colors, textures and patterns to see what works best in your space!


Mateo Londono is an avid DIYer and vegan cook who has a passion for improving and personalizing homes with cool projects. Mateo and this DIY are featured here on the TenX Homes site, where you can find out more about creating your own unique space. You can also visit The Home Depot to find other wall decor accents to make your home your own.

Pinterest DIY Blanket Stand

Easy DIY Blanket Stand FB

Glam Up Mother Nature for a Naturally Beautiful Holiday

savedbylove1_glamupmothernatureforanaturallybeautifulholiday
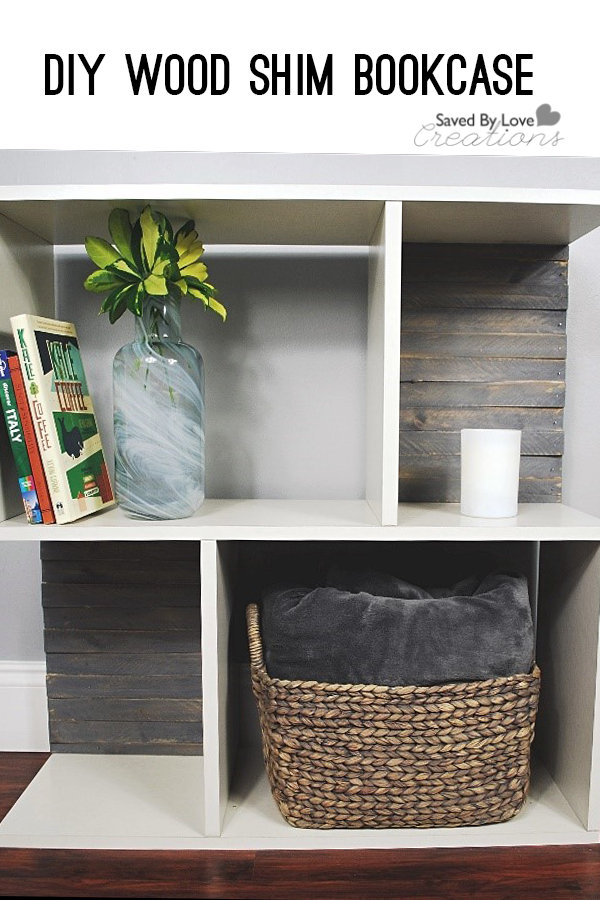
A foraging trip outdoors starts the holidays off right. It’s a sure-fire way to pick some holiday spirit, and an even better way to save your money for gifts for your loved ones rather than spending it on decor.


Combine your store-bought sparkle with nature’s bounty for beautiful decorations that don’t break the bank. Low- to no-cost natural elements are the perfect addition to your decoration collection for decorating the mantle, tabletop and tree.


Turn collecting natural goodies into a scavenger hunt with the kids. Gather various sizes of pinecones, acorns, bare branches, evergreens and berries. If you don’t have any evergreens outside, you can stop anywhere fresh Christmas trees are sold and get the discarded lower branches for a low cost, or possibly for free. These work just fine to cut up for decorations. Finally, add in goodies from the grocery store like apples, popcorn, cranberries or citrus fruits. Now you’ve got the recipe for a pretty holiday home. It’s time to start decorating!

diy-holiday-decor-using-nature

Nature on Display


savedbylove2_glamupmothernatureforanaturallybeautifulholiday


Start with what you already own. Clear vases or jars, cake stands, baskets and plates turn into decorations with a bit of creativity.


Create an ornament display that is sure to become a focal point. Collect bare branches and dig into your ornament collection. Tying the baubles on bare limbs makes them stand out and really come to life. Do something as simple as these red balls on one branch, or collect several branches to place in a row of jars. You could even get a large multi-limbed branch to stand in a large floor vase.


You can also fill glass containers with pinecones and acorns. Add a bit of glam by dusting them with glitter or fake snow. Try tucking a few tiny ornaments in the glass container, too—look for a really interesting one to highlight, such as a tiny pair of ice skates or a darling little Santa.


Holiday Arrangement


savedbylove3_glamupmothernatureforanaturallybeautifulholiday


Create a floral-shop worthy display with a combination of your natural found items and produce. This wonderfully scented decoration is easy to make. Gather up apples, oranges, whole cloves, pinecones and greenery. Select a container—a basket or bowl will work.


Begin by pushing the cloves into the oranges in any pattern you like. If your basket or bowl is very deep, stuff the bottom of it with some balls of paper. First, set in your oranges, toward the center. Arrange pinecones and apples around the oranges. Cut small pieces of greenery and tuck them in between the fruit to hide gaps or any paper that shows. Finish by accenting here and there with a bit of something bright. You can add a few tiny ornaments, colorful cranberries, sprigs of holly or a dusting of fake snow.


Tabletop Centerpiece


savedbylove4_glamupmothernatureforanaturallybeautifulholiday


A low centerpiece is just the ticket for holiday dinners because you want to be able to see over it and enjoy conversations with family and friends. You can make a beautiful, simple one with your natural collection and some shiny ornament balls.


Collect pinecones, fall leaves, greenery, ornaments and a bit of paint. Check your paint stash for holiday shades of gold, silver, white, copper or red. Choose one you think compliments your ornaments. Paint the fall leaves and a few pinecones and allow the paint to dry. Leave some of the pinecones natural.


Use a flat plate or tray to hold your centerpiece. Snip evergreens in small pieces and arrange flat to cover the plate or tray. Arrange large pinecones in the center and then add the ornaments to the plate. Tuck tiny pinecones and the painted leaves around the large cones and balls.


Let It Shine


savedbylove5_glamupmothernatureforanaturallybeautifulholiday


Holiday parties and family gatherings are a celebration and celebrations call for candles. Natural elements can come into play with candles. Here are a few ideas:


  • Place a few cranberries and snips of greenery in a jar. Add water and drop a floating candle in the top. Add glamour by nestling them in some shiny bead garland or silvery icicles.
  • Place fresh cranberries in a tall vase. Nestle a candle into the berries. Tie a pretty ribbon around the vase.
  • Arrange three to five tiny votive candles on a plate with a rim. Surround them with fresh cranberries, whole nuts and acorns.


Strings of Fun


savedbylove6_glamupmothernatureforanaturallybeautifulholiday


Generations of families have enjoyed stringing popcorn on thread to decorate their tree. While you can certainly do just popcorn, it’s fun to give it a glamourous touch, like adding shiny gold jingle bells or a small ornament every so often. Don’t stop with just popcorn – you can string cranberries and even gummy candies!


After the holidays are over, don’t toss out the strings of popcorn and berries. Hang them on bushes in the yard and enjoy watching the birds have a winter feast.


As an organizational expert, Lea Schneider helps homeowners get organized, but also dabbles in decorating. She provides some great tips on using nature to decorate for the holidays. Visit the Home Depot to find a great selection of Christmas decorations.


How to Make Jewelry From Flattened Pennies

pin-how-to-make-upcycled-jewelry-from-pennies

This post has been a long time coming. At this point, I can’t even recall what inspired me to smash pennies and turn them into jewelry, but something did and here we are. I will walk you through the interesting, not entirely legal process I used. Please note that in no way am I encouraging anyone to break the law, or to go anywhere near railroad tracks. The Midnight Rider controversy is no joke. While cute, this jewelry is not worth dying for, so be smart.

how-to-make-aa-jewelry

SUPPLIES:

Pennies or other coins

Clear masking tape

Jump rings

Jewelry Hole punch

jewelry rivets

Vintaj metal paints

Lisa Pavelka Resin Magic Glos

Magic Glos UV Resin, by Lisa Pavelka

Sizzix machine

Butterfly rings Sizzix Die

Media Mixage Triangle Dies

Media Mixage Circle Dies

Vintaj Vogue Stamping Blanks, Triangle 14mm

Your favorite embossing folders

eyelet setter

ear wire

Jewelry pliers (2 pair)

Paint brush or sponge dauber
1/4 cup white vinegar
1 teaspoon salt
Non-metal bowl
Paper towels


wm-aa-jewelry

TUTORIAL:

tape-pennies-to-track

This is the sketchy part. SBLC assumes no responsibility for any injuries that may occur. That said, this is also the super fun part. Tape the coins to the railroad track as shown in the photo. Not taping them just means searching needlessly after the train has passed, since they get thrown from their original location during the process. The tape keeps them in place.

pennies-after-flattening

This is what y0u will have when you retrieve your now flattened pennies. Flat, but yucky, right? No problem. To clean the little guys, pour the vinegar into the bowl and stir in salt. Put about 5 pennies into the solution and let them soak for about 10 seconds. Use a toothbrush and running water to remove debris and rinse clean.

how-to-flatten-pennies-for-free

They don’t have to be perfect.

how-to-flatten-pennies

Emboss your pennies and die cut into jewelry shapes. Here i cut the flattened and embossed pennies into circles and attached Vintaj Vogue Stamping Blanks Triangle 14mm using a rivet. Just hole punch the penny circles, insert rivet through triangle and circle, set with eyelet setter and attach jump ring and ear wires. Done!

aa-necklace-circle-triangle

For this pendant, I die cut a ring with the Sizzix butterfly rings die – a favorite die of mine. I cut a triangle with another embossed flattened penny and painted it using vintaj patina paints for metal. Once the paint was dry, I applied Magic Glos UV Resin, by Lisa Pavelka. I love the domed resin look. You can put this in direct sunlight to cure, or cure it in 10 minutes using Lisa Pavelka’s UV light. I went the 10 minute route! It’s been awhile since I used that stuff, and I forgot how fun it is.

upcycled-coin-pendant-jewelry-tutorial

This piece is comprised of a Vintaj metal blank (the background circle) and a flattened penny triangle that I painted with Vintaj Patina. I didn’t seal it. I enjoy the simplicity of the circle/triangle, and love the colors together. After applying the paint, go over the triangle lightly with medium grit sand paper to reveal the raised areas created by embossing previously.

Visit here for more RESIN JEWELRY TUTORIALS

fb-how-to-make-upcycled-jewelry-from-pennies

What do you think? Do you have a less illegal method for flattening pennies? Can your rope your husband into doing it for you, like I did?

You can use any coin, by the way. I just like copper.

I’d love to see what you can do with flattened coins. If you don’t have a die cut machine, you can cut shapes with metal shears or tin snips for your own custom creations! Happy crafting!

How to Make a Gorgeous Fall Wreath

DIY Fall Decor

It has been way too long since I made and shared a DIY wreath project with you all. That is why I am a super stoked about today’s simple, cheap tutorial – a gorgeous gilded wreath to adorn your front door. You are going to need just a few supplies and an hour to create your very own. Let’s get started!

how-to-make-a-fall-wreath-savedbyloves

SUPPLIES:

how-to-spray-paint-plastic

Plastic or foam pumpkins and gourds (I got mine for 50% off at Michaels)

Krylon Dual spray paint in metallic gold, or your favorite color

A wreath form, or cardboard with and scissors(I used a pizza box)

Hot glue gun and sticks

Ribbon to coordinate with your paint choice

Drop cloth or old sheet to protect surface from overspray

diy-fall-decor

Begin by laying out your pumpkins on the drop cloth. This project is best done outside since you will be spray painting.

how-to-spray-paint-plastic

Spray pumpkins per instructions on can. Make sure you are using paint that has primer in it. If not, you will need to prime the pieces first. I love Krylon Dual because it has paint and primer in one. It is my go to product for spray painting.

how-to-make-your-own-wreath-form

Now for the wreath form. I showed you how to make your own from cardboard in this DIY Poinsettia Wreath tutorial. For this project, I wrapped the cardboard wreath form in duct tape for durability since I planned to hang the wreath outdoors.

diy-metallic-pumpkin-fall-wreath-wm

Before attaching the painted, dry pumpkins, place the ribbon around the wreath. Hot glue it into place, then begin attaching pumpkins.
how-to-hang-a-wreath

It’s as easy as that!

pumpkin-diy-fall-wreath-from-savedbyloves

TIP: For more cohesiveness, once all the pumpkins are in place, use the same spray paint to spray the wreath form where it is visible in the spaces.

For more of our festive wreaths, click:

Saved by Love Creations DIY Wreath Tutorials

Over 50 Pumpkin Recipes to Make

Over 50 Pumpkin Recipes @savedbyloves
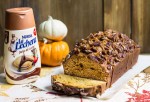
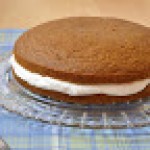
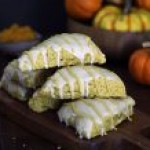
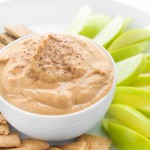
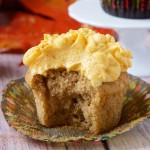
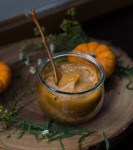
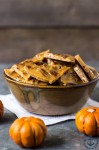
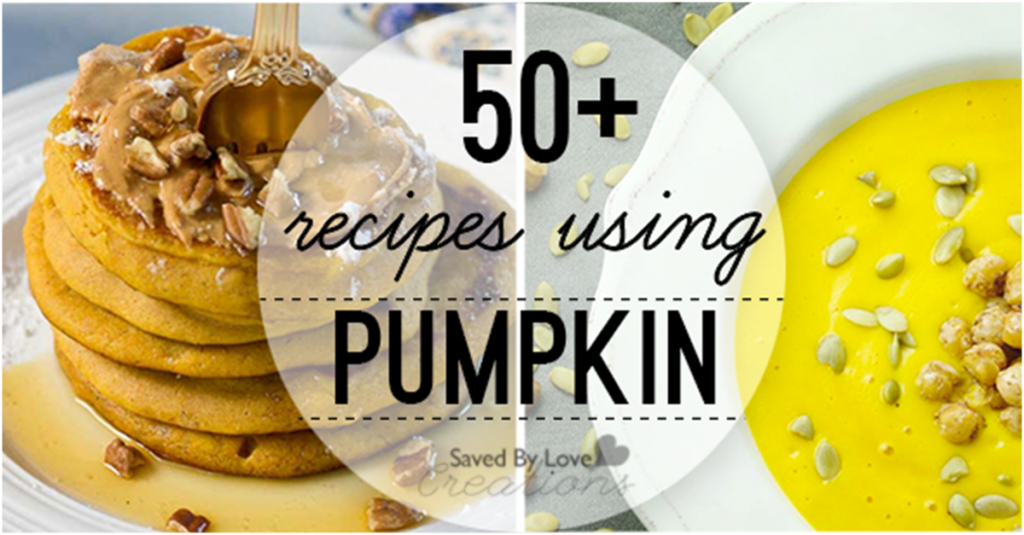
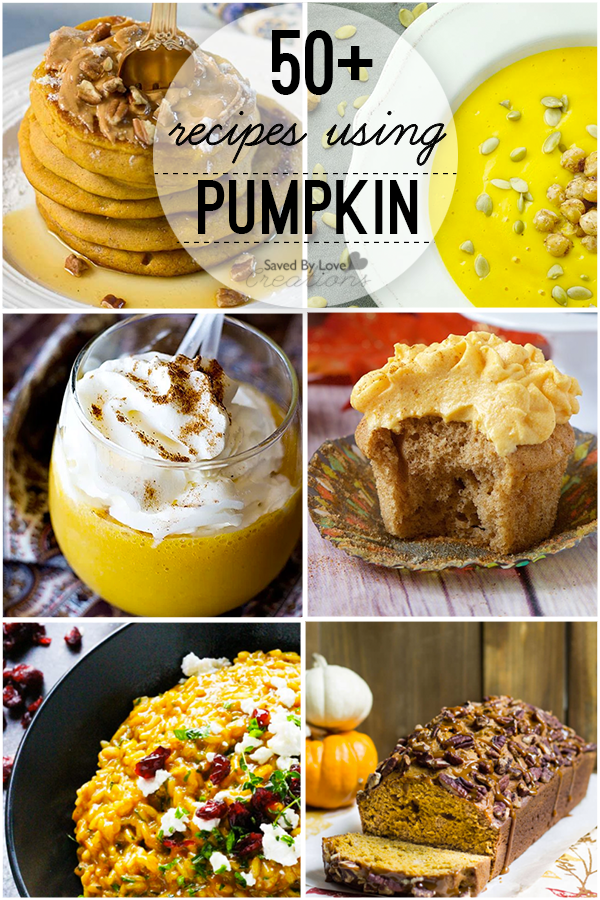
It is one of the best things about fall and the holiday season, a great source of potassium and Vitamin A, and is over 90% water. What is it, you ask? We are talking about pumpkin! Today we are sharing over 50 tasty pumpkin recipes for you to enjoy. You will see pumpkin soup, scones and everything in between. If we missed your favorite pumpkin recipe, leave us a link in the comments so we can share your delicious creation!

Over 50 Pumpkin Recipes @savedbyloves

Privacy Policy